No products
Prices are tax included
Product successfully added to your shopping cart
There are 0 items in your cart. There is 1 item in your cart.


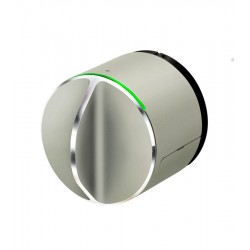
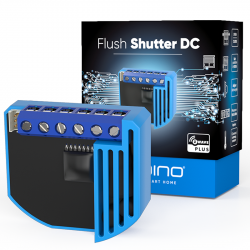
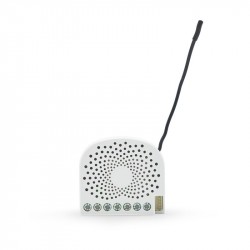
Shelly Qubino Wave 1 - Contacto Seco Micromódulo Relé simple de hasta 16A
QNSW-001X16EU
New
Control a wide range of office devices and equipment, such as electric locks, gates, garage doors, irrigation systems, LED strips, lights and outlets, from anywhere. The output contact is voltage-free (dry contact), allowing you to connect various power loads up to 16 A to the device.
In Stock
- Remove this product from my favorite's list.
- Add this product to my list of favorites.

Technical characteristics
| Technology | Z-Wave Serie 800 |
More info
Z-Wave relay in Dry Contact micromodule format (potential free)
Extremely low power consumption: 0.3 W.
Latest technology: Z-Wave 800 Series Chip
Z-Wave frequency band: 868.4 MHz (CEPT countries)
Automatic configuration with SmartStart
Security 2 authenticated for the highest level of security
Supports over-the-air (OTA) firmware updates
Works with certified Z-Wave gateways and over 4,000 Z-Wave devices
*A home automation controller (smart hub) is not included. A Z-Wave gateway (smart hub) is required for device configuration.
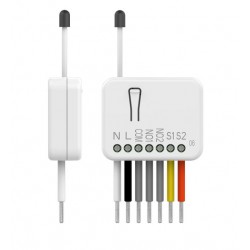
The Shelly Qubino Wave 1 module is a Z-Wave 800 embedded switch with a potential-free output. The module is designed to control devices such as electric locks, garage doors, entry doors, irrigation systems, power outlets and lighting. With a maximum load capacity of 16A, the module provides enough power for various applications. It is possible to control the module wirelessly via Z-Wave, as well as via a wall switch.
The module can be powered with a voltage of 110-240 V AC, 24-48 V DC or 12 V DC, providing flexibility in power supply. Additionally, the output is potential-free, meaning that the input voltage can differ from the device you want to switch. This allows compatibility with various electrical devices. Additionally, the module is equipped with overheating protection.
Shelly Qubino is powered by Z-Wave
By using Z-Wave, smart home products can seamlessly communicate with each other, regardless of their brand or platform, thanks to a centralized smart hub! Shelly Qubino devices are powered by the latest generation of Z-Wave chips (S800), one of the most popular standardized smart home technologies in the world.
*Z-Wave devices have specific requirements to function properly, such as the need to use a compatible Z-Wave hub.
For more information, please visit the official Z-wave website: www.z-wave.com.
Works with any Z-Wave home automation controller
Wave 1 is retrofit and designed to fit behind any switch or socket, instantly transforming it into a smart one. Once installed, add it to your Z-Wave network (Z-Wave gateway required) and control connected appliances from anywhere using your smartphone or tablet. Shelly Qubino devices work with over 4,000 Z-Wave certified devices and gateways.
Characteristics
Works with Z-Wave technology
Connect Wave 1 to your Z-Wave network and control it remotely. It is compatible with all certified Z-Wave gateways.
Associations
Establish direct communication between devices on your local Z-Wave network and configure custom actions without the need for a hub.
dry contact
Connect different power loads (up to 16 A) to the device, which has an internal potential-free relay (dry contact) electrically isolated from the micromodule's own power supply.
Wide voltage range
Uses a wide range of output voltage levels. Supports low voltages.
Custom schedules
Create custom schedules aligned with your daily routine or sync with sunrise/sunset to manage your lighting (gateway required).
Smart scenes
Set up custom scenes by combining Wave 1 with any other Z-Wave device (gateway required)...
Endless applications of use
Automate your garden irrigation system effortlessly
Keeping your garden green with a busy lifestyle can be a challenge, but with an automated irrigation system, you can effortlessly manage your garden's watering needs with a tap on your smartphone, even when you're on vacation. For complete peace of mind, simply schedule your watering and the sprinklers will automatically turn on and off. Yes, that easy.
Control your garage door remotely
Have you closed the garage door when leaving home? From now on, you just have to check it on your smartphone. Wave 1 has operating voltages of 12V DC and 24-48V DC, making it perfect for garage door control.
Set up partnerships and let your home welcome you
Configure Wave 1 and other devices on your Z-Wave network and create associations between them for direct communication without a gateway. Automate the door lock and lights and set a rule: every time the front door is unlocked, the lobby/hallway lights come on.
Automate your lights and make them follow your schedule
Make any light switch smart with Shelly Wave 1 and control them through your phone or with a voice assistant. Use your hub app to set up automated scenes based on a time or sunset/sunrise. This way, you can schedule your porch lights to come on around the time you get home from work, or your hallway lights to turn off after your family's bedtime. And don't worry: the light switches can still be used manually to suit the needs of everyone in your home.
TECHNICAL SPECIFICATIONS
| Feeding | 110-240 V AC / 24-48 V DC / 12 V DC ± 10% |
|---|---|
| Consumption at rest | <0.3W |
| Max Voltage of the relay in AC | 240V |
| Max current of the relay in AC | 16A |
| Max Voltage of the relay in DC | 30V |
| Max current of the relay in DC | 10A |
| Protection against overheating | Yeah |
| Distance | Up to 40 m indoors (131 ft.) (depends on local conditions) |
| "Z-Wave" repeater: | YEAH |
| Chip | Z-Wave" S800 |
| Z-Wave Frequencies": | 868.4MHz; 865.2MHz; 869.0MHz; 921.4MHz; 908.4MHz; 916MHz; 919.8MHz; 922.5MHz; 919.7-921.7-923.7MHz; 868.1MHz; 920.9MHz |
| Maximum radio frequency power transmitted in the frequency band(s) | <25mW |
| Size (H x W x D) | 37x42x16 ±0.5 mm / 1.46x1.65x0.63 ±0.02 in |
| Weight | 26g/0.92oz. |
| Mounting | Mechanism box or register box |
| Max tightening torque screw terminals | 0.4 Nm / 3.5 lbin |
| Driver section | 0.5 to 1.5 mm² / 20 to 16 AWG |
| Conductor Stripped Length | 5 to 6 mm / 0.20 to 0.24 in |
| Housing material | Plastic |
| Color | Blue |
| Room temperature | -20°C to 40°C / -5°F to 105°F |
| Humidity | 30% to 70% RH |
| Max. altitude | 2000 m / 6562 ft. |
Extended Z-Wave info
The first five digits of the key are highlighted or underlined to help the user identify the PIN Code part of the DSK text. The DSK is additionally represented with a QR Code as shown on the image.
Note! All Device outputs (O, O1, O2, etc. - depending on the Device type) will turn the load 1s on/1s off /1s on/1s off if the Device is successfully added to/removed from a Z-Wave™ network.
6.1.1 SmartStart adding (inclusion)
SmartStart enabled products can be added into a Z-Wave™ network by scanning the Z-Wave™ QR Code present on the Device with a gateway providing SmartStart inclusion. No further action is required, and the SmartStart device will be added automatically within 10 minutes of being switched on in the network vicinity.
1. With the gateway application scan the QR code on the Device label and add the Security 2 (S2) Device Specific Key (DSK) to the provisioning list in the gateway.
2. Connect the Device to a power supply.
3. Check if the blue LED is blinking in Mode 1. If so, the Device is not added to a Z-Wave™ network.
4. Adding will be initiated automatically within a few seconds after connecting the Device to a power supply, and the Device will be added to a Z-Wave™ network automatically.
5. The blue LED will be blinking in Mode 2 during the adding process.
6. The green LED will be blinking in Mode 1 if the Device is successfully added to a Z-Wave™ network.
6.1.2 Adding (inclusion) with a switch/push-button
1. Connect the Device to a power supply.
2. Check if the blue LED is blinking in Mode 1. If so, the Device is not added to a Z-Wave™ network.
3. Enable add/remove mode on the gateway.
4. Toggle the switch/push-button connected to any of the SW terminals (SW, SW1, SW2, etc.) 3 times within 3 seconds (this procedure puts the Device in Learn mode*). The Device must receive on/off signal 3 times, which means pressing the momentary switch 3 times, or toggling the switch on and off 3 times.
5. The blue LED will be blinking in Mode 2 during the adding process.
6. The green LED will be blinking in Mode 1 if the Device is successfully added to a Z-Wave™ network.
*Learn mode - a state that allows the Device to receive network information from the gateway.
6.1.3 Adding (inclusion) with the S button
1. Connect the Device to a power supply.
2. Check if the blue LED is blinking in Mode 1. If so, the Device is not added to a Z-Wave™ network.
3. Enable add/remove mode on the gateway.
4. To enter the Setting mode, quickly press and hold the S button on the Device until the LED turns solid blue.
5. Quickly release and then press and hold (> 2s) the S button on the Device until the blue LED starts blinking in Mode 3. Releasing the S button will start the Learn mode.
6. The blue LED will be blinking in Mode 2 during the adding process.
7. The green LED will be blinking in Mode 1 if the Device is successfully added to a Z-Wave™ network.
Note! In Setting mode, the Device has a timeout of 10s before entering again into Normal mode.
Note! The Device will be removed from your Z-wave™ network, but any custom configuration parameters will not be erased.
Note! All Device outputs (O, O1, O2, etc. - depending on the Device type) will turn the load 1s on/1s off /1s on/1s off if the Device is successfully added to/removed from a Z-Wave™ network.
6.2.1 Removing (exclusion) with a switch/push-button
1. Connect the Device to a power supply.
2. Check if the green LED is blinking in Mode 1. If so, the Device is added to a Z-Wave™ network.
3. Enable add/remove mode on the gateway.
4. Toggle the switch/push-button connected to any of the SW terminals (SW, SW1, SW2,…) 3 times within 3 seconds (this procedure puts the Device in Learn mode). The Device must receive on/off signal 3 times, which means pressing the momentary switch 3 times, or toggling the switch on and off 3 times.
5. The blue LED will be blinking in Mode 2 during the removing process.
6. The blue LED will be blinking in Mode 1 if the Device is successfully removed from a Z-Wave™ network.
6.2.2 Removing (exclusion) with the S button
1. Connect the Device to a power supply.
2. Check if the green LED is blinking in Mode 1. If so, the Device is added to a Z-Wave™ network.
3. Enable add/remove mode on the gateway.
4. To enter the Setting mode, quickly press and hold the S button on the Device until the LED turns solid blue.
5. Quickly release and then press and hold (> 2s) the S button on the Device until the blue LED starts blinking in Mode 3. Releasing the S button will start the Learn mode.
6. The blue LED will be blinking in Mode 2 during the removing process.
7. The blue LED will be blinking in Mode 1 if the Device is successfully removed from a Z-Wave™ network.
Note! In Setting mode, the Device has a timeout of 10s before entering again into Normal mode.
6.3.1 Factory reset general
After Factory reset, all custom parameters and stored values (kWh, associations, routings, etc.) will return to their default state. HOME ID and NODE ID assigned to the Device will be deleted. Use this reset procedure only when the gateway is missing or otherwise inoperable.
6.3.2 Factory reset with a switch/push-button
Note! Factory reset with a switch/push-button is only possible within the first minute after the Device is connected to a power supply.
1. Connect the Device to a power supply.
2. Toggle the switch/push-button connected to any of the SW terminals (SW, SW1, SW2,…) 5 times within 3 seconds. The Device must receive on/off signal 5 times, which means pressing the push-button 5 times, or toggling the switch on and off 5 times.
3. During factory reset, the LED will turn solid green for about 1s, then the blue and red LED will start blinking in Mode 3 for approx. 2s.
4. The blue LED will be blinking in Mode 1 if the Factory reset is successful.
6.3.3 Factory reset with the S button
Note! Factory reset with the S button is possible anytime.
1. To enter the Setting mode, quickly press and hold the S button on the Device until the LED turns solid blue.
2. Press the S button multiple times until the LED turns solid red.
3. Press and hold (> 2s) S button on the Device until the red LED starts blinking in Mode 3. Releasing the S button will start the factory reset.
4. During factory reset, the LED will turn solid green for about 1s, then the blue and red LED will start blinking in Mode 3 for approx. 2s.
5. The blue LED will be blinking in Mode 1 if the Factory reset is successful.
6.3.4 Remote factory reset with parameter with the gateway
Factory reset can be done remotely with the settings in Parameter No. 120.
Reviews
30 other products in the same category:
-
Bypass for...
-
Qubino...
-
Qubino...
-
Philio...
-
AEOTEC -...
-
AEOTEC -...
-
Aeotec...
-
Aeotec Nano...
-

Aeotec Nano...
-
Qubino Mini...
-

WiDom Smart...
-
WiDom Smart...
-
WiDom Smart...
-
Qubino...
-
Fibaro...
-
Micromodule...
-
FIBARO RGBW...
-

FIBARO...
-
HELTUN -...
-
HELTUN -...
-
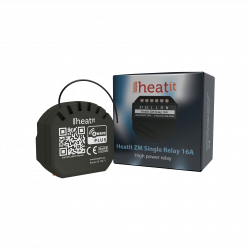
Heatit ZM...
-
Philio...
-
Philio...
-
Philio...
-
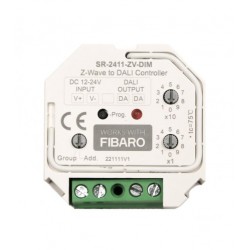
Z-Wave to...
-
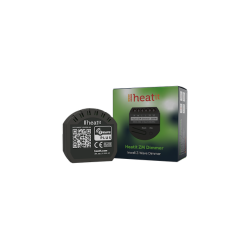
Heatit ZM...
-
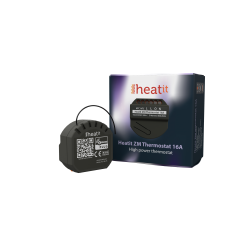
Heatit ZM...
-

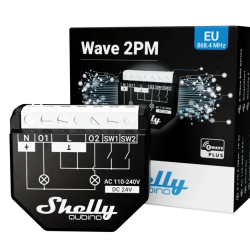
Shelly...
-
Shelly...
-

Shelly...