No products
Prices are tax included
Product successfully added to your shopping cart
There are 0 items in your cart. There is 1 item in your cart.
Viewed products
-

Aeotec Recessed Door...
Invisible automation is perfect...
-

Orkli thermostatic...
Orkli thermostatic valve measuring...
-

GR-SMARTHOME - Z-Wave...
Z-Wave motor to domotize and allow us...
-

Dahua outdoor IP...
Dahua StarLight IP bullet camera with...
-

IP65 Waterproof Box...
IP65 box for watertight connections....


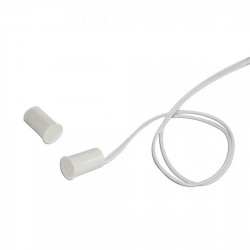
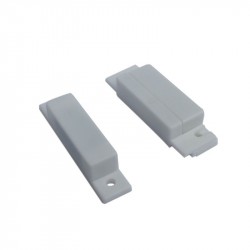
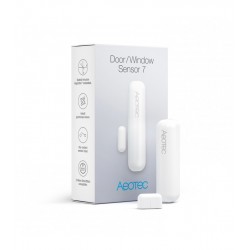
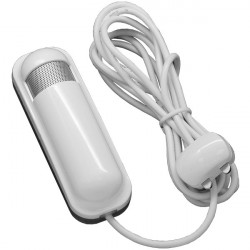
Aeotec Recessed Door Sensor 7 - Z-Wave recessed door sensor
AEOEZW187
New
Invisible automation is perfect automation. The Aeotec version 7 recessed door sensor is installed in the door frame or embedded in the door itself and is completely invisible.
In Stock
- Remove this product from my favorite's list.
- Add this product to my list of favorites.

Technical characteristics
| Technology | Z-Wave 700 Series |
More info
Aeotec Recessed Door Sensor 7 Recessed Door Sensor - Z-Wave + 700 Series
Really smart. Really invisible. At less than 1cm wide, some might call it compact. We prefer to call it invisible. It's a door sensor that is designed the way door sensors should always be: powerful but invisible. It is installed in the frame of a door and supervises the use of the same, which allows the supervision of the security and powers the intelligent automation.
Invisible installation
The beauty of the invisible installation is complemented by the beauty of the simple installation. Installation of the pocket door sensor 7 is easy. And pairing it with an automation system requires nothing more than activating its battery and scanning its QR code. Making it invisible means little more than a hidden hole in the door frame. It's the kind of setup that takes no more than 10 minutes but provides years of intelligence and automation.
Perfectly improved
Incorporates Gen7 technology
Safety sensors must be safe. Automation sensors must be advanced. The 7 Pocket Door Sensor is powered by Aeotec Gen7 technology and includes Z-Wave Plus V2, S2 wireless security, and SmartStart installation.
2 year battery life
With its new technology, the Pocket Door Sensor 7 now lasts twice as long as previous models - up to 2 years. And once it's gone, changing the battery is as simple as removing the recessed door sensor 7 from the door frame, changing the battery, and putting the sensor back in the door.
The best of wireless technology
Safety sensors must be reliable. Recessed door sensor 7 is. Using the Z-Wave 700 series, its wireless range allows the pocket door sensor 7 to communicate with other Z-Wave devices up to 150 meters away.
FUNCTIONS:
Z-Wave + V2 door opening sensor
Installation directly on the door frame
Does not alter the aesthetics of the room in which it is installed
Up to 2 years of battery life
Incorporates Z-Wave Smart Start and S2 Security technologies
Z-Wave Plus 700 wireless technology
TECHNICAL SPECIFICATIONS:
Power: 3-volt 800mAh CR2 lithium battery
Battery life: 2 years of autonomy (when there are <20 open / close reports and 4 wake up reports per day)
Radio frequency: 868.42 MHz
Operating distance: up to 150 meters outdoors, 40 meters indoors
Operating humidity: 8 to 80%.
Operating temperature: 0 ° C to 40 ° C
Maximum distance to magnet: 1 cm
Dimensions:
Sensor: 19.2 x 64 mm
Magnet: 22 x 13 mm
Weight: 30g
Extended Z-Wave info
Manual download HERE.
1. Make sure the product is powered.
2. Press and hold the Action Button for at least 20s, and release when LED becomes solid red color, then Factory Reset is performed.
3. Wait for the LED indicator to be slow fade-in fade-out red LED color, which indicates the reset operation is successful. Otherwise, please try again. Contact us for further support if needed.
Note:
1. This procedure should only be used when the primary controller is missing or inoperable.
2. Factory Reset will:
(a) Remove the product from Z-Wave network;
(b) Delete the Association setting;
(c) Restore the configuration settings to the default.
2. Make sure the product is powered.
3. Single-click the Action Button; its red LED will flash for a few seconds.
4. Confirm the removing result. Successful removing can be confirmed by your controller’s message or the LED status. If the removing is successful, LED will change to the default unpaired state which is slow fade-in fade-out red color. If its LED extinguish without slow fade-in fade-out red color, it indicates the removing is unsuccessful. Repeat the above steps or contact us for further support if needed.
2. Squeeze the sides of the sensor casing to alleviate pressure on the chipboard; slide the chipboard out.
3. Remove the Pull Tab to engage the pre-installed battery. The sensor’s LED will fade the color red in and out for a few seconds to indicate that it’s powered on.
4. To add the product to your automation network manually:
(a) Set your main controller into its 'add product' mode. Refer to its manual if you are unsure of how to perform.
(b) Single-click the Action Button; its red LED will flash for a few seconds.
(c) If your controller supports S2 security, and you want to add the product into S2 Authenticated network, please scan the QR code or enter the PIN code (the underlined 5-digits of the DSK) when prompted. [IMPORTANT] QR/PIN can be found at the bottom of the product. A full DSK string can be found when you open the packaging on the Aeotec Logo Side. Please cut it out of the packaging and write some memo on its backside. Keep it in a safe place.
(d) Wait for the adding process to end.
(e) Confirm the adding result. Successful adding can be confirmed by your controller’s message or the LED status. If adding is successful, LED will become solid red color for 10 minutes and then off, or goes into sleep immediately if receiving the Wake Up No More Information from the controller. If its LED goes back to slow fade-in fade-out red color for 10 seconds, it indicates adding is unsuccessful. The product will auto-reset and then activate SmartStart. Repeat the above steps or contact us for further support if needed.
6. Squeeze the sides of the sensor casing lightly again and re-insert the chipboard as it was. Re-attach the lid.
7. Recessed Door Sensor 7 is now a part of your Z-Wave home control system. You can configure it and its automations via your Z-Wave system; please refer to your software's user guide for precise instructions.
2. Press and hold the Action Button for at least 2s and release when the LED becomes slow pulsing red color, then Wake Up Notification is issued.
3. Wake Up destination is according to the Wake Up Interval Set. It will stay awake for 10 minutes after issuing Wake Up Notification, that is called 10-Minutes Awake Mode, however it will go into sleep immediately if receives Wake Up No More Information by the Wake Up destination. If you want to exit the 10-Minutes Awake Mode manually, please single-click the Action Button, then it will go into sleep immediately and its LED will extinguish.
Note:
There is another way to manually trigger Wake Up, that is repower on, but it’s not recommended for inconvenience. The Wake Up destination is according to the Wake Up Interval Set. The Wake Up period starts when the node issues a Wake Up Notification and it ends either 10 seconds after the last received/transmitted frame or at the reception of a Wake Up No More Information Command by the Wake Up destination.