No products
Prices are tax included
Product successfully added to your shopping cart
There are 0 items in your cart. There is 1 item in your cart.
Viewed products
-

FIBARO - Smart Implant...
FIBARO Smart Implant allows to...
-

Fibaro Intercom...
The FIBARO Intercom is a smart,...
-

Wi-Tek WI-AP215 Dual...
Dual Band AC 750 Mbps ceiling access...
-

INTESIS - Daikin WiFi...
Monitor and control your Daikin air...
-

SEAGATE BARRACUDA 1TB...
Seagate Barracuda 1TB SATAIII, 2000...


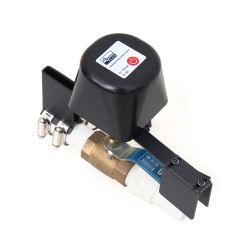
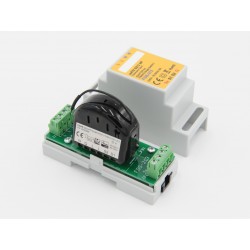
FIBARO - Smart Implant universal sensor Z-Wave +
FGBS-222
New
FIBARO Smart Implant allows to improve the functionality of wired sensors and other devices through the contribution of Z-Wave technology network communication.
Out of stock
- Remove this product from my favorite's list.
- Add this product to my list of favorites.

Technical characteristics
| Technology | Z-Wave Plus |
More info
Improve your devices by making them smart!
The FIBARO Smart Implant improves the functionality of wired sensors and other devices by adding Z-Wave network communication to them.
You can connect binary sensors, analog sensors, DS18B20 temperature sensors or DHT22 temperature and humidity sensors, and the FIBARO Smart Implant will send the measurements to the Z-Wave controller.
You can also control devices by opening / closing output contacts independently of the inputs.
The element of intelligence with great power
The Smart Implant is the intelligence of your devices in the form of a small cube. When connected to a device, the Smart Implant extends its functionality with smart features. Currently, Smart Implant is the only solution on the market that uses Z-Wave technology to convert ordinary devices into devices compatible with the Fibaro home automation system.
Safe installation
The Smart Implant is powered by a low safety voltage with a wide range of 9-30V. You are also protected against the damaging effects of a bad connection (eg bad polarity).
Neutral to the device
The use of the Smart Implant is transparent for alarm systems. This does not interfere with the normal operation of the unit.
Garage door with smart functions
Controlling the garage door with a remote control is currently a standard solution that we use. You do not have to pay to replace your garage door with a new one or invest in complicated automation systems, as you only have to connect the Smart Implant to the garage door controller to connect it to the FIBARO system and the remote control. distance.
An alarm system integrated into your smart home
Thanks to Smart Implant, the integration of the wired alarm system with the FIBARO home automation system expands the functionality of the motion and door / window opening sensors, including the ability to communicate with the smart home automation system. In addition, it allows to arm the alarm system remotely using a smartphone. You can be sure that your property and belongings are safe and you can check them wherever you are.
The heating system is now part of a smart home
The heating system is one of the areas in which we most easily introduce automation in our homes. By placing the FIBARO Smart Implant on the controller of your boiler and underfloor heating system, you bring smart heating to your home. Now, if necessary, you can change the heating times wherever you are with a smartphone, a tablet or ... you can't do anything, because FIBARO frees you from the obligation to manage the heating and knows how to take care of the heating. Comfort of each member of the family separately.
Sensors that will make your garden smart
We want to have a smart home, so why not try creating a smart garden too? The Smart Implant is an opportunity for gardening enthusiasts who have equipped their garden with sensors for wind, temperature and soil moisture. By placing the Smart Implant on the sensor, we equip it with a connection function to the FIBARO system, which collects the transmitted information and can start watering the garden or heating the pool water at the right time.
A second life for your old devices
We often have valuable devices with us that we want to keep because of their unique feel or unique design. Thanks to Smart Implant, devices that have been tested over the years, such as AV receivers, radios, amplifiers and projectors, can continue to serve us and, moreover, they can be part of our system. smart home After installing the Smart Implant on your audio equipment, you can activate it using the voice command. Enjoy your favorite team in a new smart version.
Smart switch that activates the FIBARO system scene you are looking for
We love it when a little effort on our part is enough to make appliances start to make our lives easier. By installing the Smart Implant on a wall switch and your selected equipment, you can start the 'Home Cinema' scene in one go. In an instant, the light will dim, the projector and music will turn on, and the blinds will close. The Smart Implant is small but extremely versatile.
A device for special tasks
The smart implant is the culmination of the work carried out in the extension of the functionalities of the FIBARO universal binary sensor that results from the analysis of the installers' needs.
FUNCTIONS:
Compatible with any Z-Wave or Z-Wave Plus certified controller
Have your alarm system communicate with your Z-Wave home automation network
Supports Z-Wave network security modes: S0 with AES-128 encryption and S2 authenticated with PRNG-based encryption
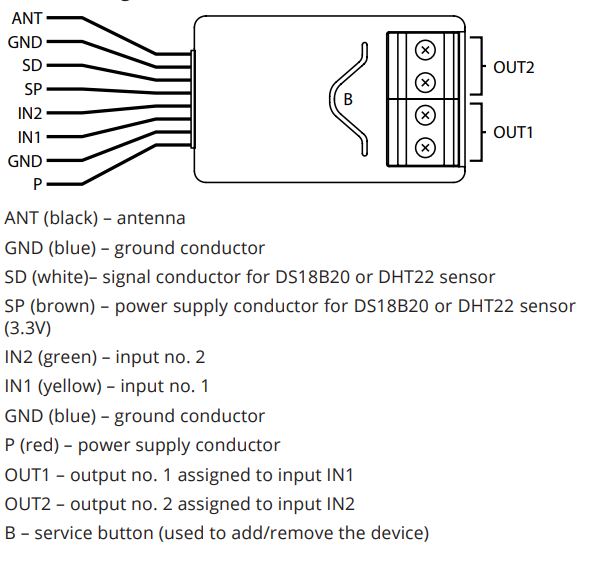
2 potential-free inputs (connection of 2 alarm detectors, for example)
2 independent potential-free outputs
It works like a Z-Wave signal repeater.
Remote device control
Up to 12 possible actions assigned to a scene.
Compatibility with alarm detectors.
Support for two binary sensors and 0-10V
Integrated temperature sensor
Supports up to 6 1-wire Dallas DS18B20 temperature sensors or DHT-22 temperature and humidity sensor
TECHNICAL CHARACTERISTICS:
Module type: Z-Wave transmitter / receiver
Power supply: 9-30V DC ± 10%
tickets:
2x 0-10V / binary analog inputs
1 1-wire serial input (for DHT22 or DS18B20 sensors)
Outputs: 2x potential-free outputs (for control of external circuits)
Supported digital sensors: 6 DS18B20 or 1 DHT22
Maximum output current: 150mA
Maximum voltage at the outputs: 30V DC / 20V AC
Integrated temperature sensor measuring range: -55 ° C to 126 ° C
Wireless technology: Z-Wave (500 series chip)
Radio frequency: 868.4 MHz
Range: up to 50m outdoors, up to 30m indoors (depending on terrain and building structure)
Operating temperature: 0-40 ° C
Dimensions: 29 x 18 x 13mm (L x W x H)
All documentation and manuals for Fibaro products are available on the website manuals.fibaro.com
Download
Extended Z-Wave info
Manual download HERE.
Resetting the device is not the recommended way of
removing the device from the Z-Wave network. Use this procedure only when the network primary controller is missing or inoperable. Certain device removal can be achieved by the procedure of removing described.
1. Press and hold the button to enter the menu.
2. Release button when the device glows yellow.
3. Quickly click the button to confirm.
4. After few seconds the device will be restarted, which is signalled with the red colour.
1. Power the device.
2. Set the main controller in (Security/non-Security Mode) add mode (see the controller’s manual).
3. Quickly, triple click button on the device housing or switch connected to IN1 or IN2.
4. If you are adding in Security S2 Authenticated, scan the DSK QR code or input the 5-digit PIN code (label on the bottom of the box).
5. LED will start blinking yellow, wait for the adding process to end.
6. Successful adding will be confirmed by the Z-Wave controller’s message.
To add the device to the Z-Wave network using Smart Start:
1. Set the main controller in Security S2 Authenticated add mode (see the controller’s manual).
2. Scan the DSK QR code or input the 5-digit PIN code (label on the bottom of the box).
3. Power the device.
4. LED will start blinking yellow, wait for the adding process to end.
5. Successful adding will be confirmed by the Z-Wave controller’s message.
1. Power the device.
2. Set the main controller into remove mode (see the controller’s manual).
3. Quickly, triple click button on the device housing or switch connected to IN1 or IN2.
4. LED will start blinking yellow, wait for the removing process to end.
5. Successful removing will be confirmed by the Z-Wave controller’s message.
Reviews
Super versátil
Este equipo es magnifico. Super util.
Accessories
-
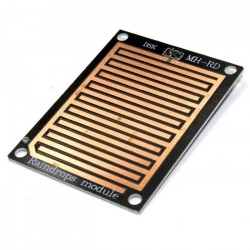
FR-04 rain sensor...
3,50 € -
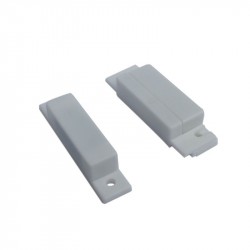
QUBINO wired rece...
9,59 € -
QUBINO - Wired op...
9,59 € -
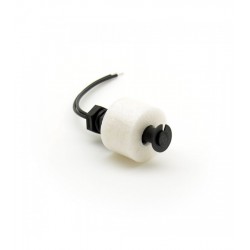
Universal Level S...
14,60 € -
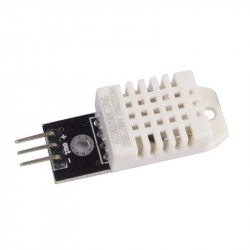
TZT DHT22 Tempera...
5,99 €