Ningún producto
Precios con IVA incluído
Producto añadido correctamente a su carrito de la compra
Hay 0 artículos en su carrito. Hay 1 artículo en su cesta.


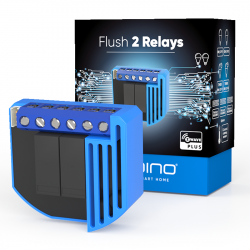
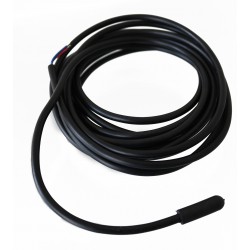
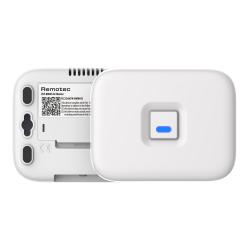
Qubino Flush On/Off Thermostat 2 - micromódulo termostato Z-Wave+
ZMNKID1
Nuevo
Termostato inteligente de tecnología Z-Wave Plus que además mide el consumo de energía. De formato encastrable/oculto para caja de mecanismo o caja de superficie. Dispone de sonda. Soporta cargas de hasta 16 amperios.
En Stock - Envío inmediato
- Eliminar de mis favoritos
- Agregar este producto a mis favoritos
- Imprimir

Características técnicas
| Tecnología | Z-Wave Plus |
| Característica | Medición de Consumo |
Descripción
El termostato Qubino Thermostat On/Off 2 es un termostato de tecnología inalámbrica Z-Wave en formato micromódulo y es ideal para el control remoto de sistemas de calefacción por suelo radiante eléctricos o de suelo radiante basados en circuitos de agua caliente (los más habituales en España), calentadores de agua eléctricos, bombas de agua caliente, radiadores eléctricos y similares. Se conecta directamente a la alimentación de 240 V AC o a una fuente de 24 V DC y no necesita pilas.
Mide el consumo de energía de su sistema de calefacción eléctrico
El termostato inteligente mide el consumo de energía del sistema de calefacción conectado: consumo de energía en W y consumo acumulado en kWh. (esto es generalmente útil si la fuente de generación de calor es eléctrica).
Mide y regula automáticamente la temperatura
El termostato inteligente Qubino Thermostat On/Off 2 viene con un sensor digital de temperatura. Permite medir y controlar la temperatura ambiente conectando y desconectando automáticamente la fuente de calor conectada.
Usted puede decidir si desea mostrar la temperatura en °C o °F en su controlador domótico Z-Wave. (Fibaro, eedomus, smartthings, Vera, Home Assistant, OpenHAB, etc.)
El termostato Qubino Flush On/Off 2 se puede utilizar con todo tipo de sistemas de calefacción directa o indirectamente.
El termostato Qubino Flush On/Off 2 funciona con calderas de calefacción por gas y gas-oil (generalmente intercalando un rele libre de potencial), bomba de calor, radiadores eléctricos calefacción por suelo radiante eléctrico, calefacción por suelo radiante mediante circuitos de agua caliente, paneles de infra-rojos...
Ventajas de Qubino Flush On/Off Thermostat 2 - micromódulo termostato Z-Wave+
Es un dispositivo inalámbrico e inteligente para el hogar, que se utiliza como controlador de la calefacción o de agua caliente, y que también mide el consumo de energía.
Es ideal para el control inalámbrico de sistemas de calefacción por suelo radiante eléctrico o suelo radiante por agua, calentadores de agua eléctricos, bombas de agua caliente, radiadores eléctricos, paneles IR, etc. Permite establecer horarios para ajustar la temperatura de su hogar a su estilo de vida. Apaga automáticamente su sistema de calefacción inteligente después de salir por la mañana y lo vuelve a encender a distancia antes de volver a casa.
Conectado a un sensor de temperatura, hace que el sistema de calefacción se encienda de vez en cuando para evitar que la temperatura baje, digamos, por debajo de los 17°C . Tu casa siempre te dará la bienvenida con una temperatura óptima, sin importar el tiempo que vayas a estar fuera.
En una casa tipo situada en el hemisferio norte, la calefacción supone aproximadamente la mitad del consumo total de energía.
El termostato Qubino Flush On/Off Thermostat 2 puede reducir significativamente las necesidades de energía y ahorrar dinero en calefacción, manteniendo la casa a una temperatura óptima. Calentar cada habitación por separado ofrece un nivel máximo de bienestar a la vez que hace que su casa sea más eficiente desde el punto de vista energético. El termostato inteligente Qubino Flush On/Off Thermostat 2 permite la zonificación inteligente, lo que significa que puede apagar la calefacción en habitaciones de forma independiente y ahorrar calefacción y energía sin comprometer el confort.
El termostato Qubino Flush On/Off Thermostat 2 le permite establecer una temperatura diferente en cada habitación en función de sus necesidades. La creación de zonas inteligentes en toda su casa reducirá el consumo de energía de su sistema de calefacción al reducir la temperatura en las habitaciones vacías. Al mismo tiempo, puede crear un clima perfecto donde y cuando sea necesario.
Poder apagar los mayores consumidores de energía, como los sistemas de calefacción, mientras se está fuera, reducirá considerablemente sus facturas de electricidad. Pero no a costa de su comodidad.
¿Cómo funciona Qubino Flush On/Off Thermostat 2?
Los dispositivos inalámbricos Qubino para smarthome están desarrollados con la tecnología mundialmente conocida para los hogares inteligentes: Z-Wave. Lo que significa que los dispositivos Qubino se conectan con un hub (pasarela o centro domótico) de hogar inteligente que también funciona con la tecnología Z-Wave. A través de la aplicación del centro domótico, podemos añadir los dispositivos Qubino a la red doméstica inteligente y controlarlos con el smartphone o establecer horarios que activen o desactiven automáticamente los dispositivos, que salten los termostatos cunado hay presencia o apagar la calefacción cuando no la hay, etc..
¿Cómo se instala?
Los dispositivos Qubino se comunican a través del protocolo inalámbrico, por lo que no es necesario derribar paredes ni instalar cables adicionales en su red eléctrica. La instalación es rápida y sencilla.
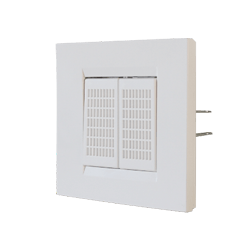
Conecte el dispositivo Qubino detrás de su interruptor de pared existente, al lado de las válvulas de calefacción eléctrica, cerca de la bomba de agua - donde lo necesite, (consulte el esquema eléctrico para los esquemas de conexión), emparéjelo con una pasarela Z-Wave y controle su dispositivo con un teléfono inteligente o establezca escenarios para que funcionen automáticamente.
Consulte los vídeos de instalación para ver diferentes ejemplos de aplicación de este termostato:
Instalación de Qubino Flush On/Off Thermostat 2 para calefacción por suelo radiante:
Instalación de Qubino Flush On/Off Thermostat 2 para calefacción mediante termo/acumulador de agua caliente (menos popular en España y Portugal)
Instalación de Qubino Flush On/Off Thermostat 2 para calefacción con paneles de infrarrojos o radiadores eléctricos:
Instalación de Qubino Flush On/Off Thermostat 2 para el control de la bomba de circulación de agua de calefacción y/o radiadores:
Para una configuración rápida y sin problemas, Qubino Termostato 2 es compatible con Z-Wave SmartStart. La configuración del termostato inteligente Qubino es fácil de usar para todos. Basta con escanear el código QR del dispositivo, instalarlo y darle corriente. La pasarela SmartStart reconoce el dispositivo y la inclusión se realiza automáticamente.
FUNCIONES:
Control remoto (a través de smartphone, tablet o PC) y encendido/apagado de válvulas locales para sistemas de calefacción por suelo radiante con agua, o de suelo radiante y resistencia eléctrica, termo-calentadores de agua eléctricos, bombas de agua caliente, radiadores eléctricos, acumuladores de tarifa nocturna y similares.
Funciona con un botón pulsador (interruptor momentáneo) y un interruptor de palanca
Capaz de medir el consumo de energía del dispositivo conectado en tiempo real a través de un smartphone
Funciona en 110-240 VAC o 24-30 VDC
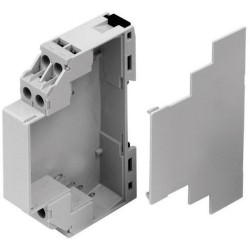
Una de las instalaciones más fáciles y rápidas de este tipo de equipos; puede integrarse incluso en las más pequeñas cajas empotradas o de empalme.
Guarda y restaura el último estado después de un corte de energía.
El rango del sensor digital de temperatura está entre -25 y +80 ° C.
Soporta la inclusión de SmartStart para una instalación rápida
Enciende y apaga automáticamente el dispositivo de acuerdo con la histéresis.
Enciende automáticamente la unidad si la temperatura es demasiado baja (anticongelante).
Soporta ajustes adicionales para usuarios expertos, lo que permite una configuración avanzada
Actúa como un repetidor de señal que mejora el alcance y la estabilidad de su red Z-Wave.
Puede ser usado para controlar y disparar remotamente otros dispositivos en su red Z-Wave
ESPECIFICACIONES TÉCNICAS
Alimentación: 110 - 240 VAC ± 10% 50 / 60Hz, (24-30VDC)
Corriente de carga nominal de la salida CA/CC (carga resistiva): 1 X 10 A (230 V CA) / 1 X 10 A / 30 V CC
Potencia del circuito de salida AC / DC (carga resistiva): 2300W (230VAC) / 240W (24VDC)
Precisión de medición de potencia: P = 5-50W, +/- 3W P> 50W, +/- 3%.
Temperatura de funcionamiento: -10 ~ + 40 ° C
Alcance de funcionamiento de la onda Z: hasta 40 m en interiores
Dimensiones (AnxAlxPr) (con embalaje): 41,8x36,8x16,9 mm (115x96x22 mm)
Peso (con embalaje): 48 g (64 g)
Consumo de energía: 0,4W
Para instalación en cajas: Ø ≥ 60 mm o 2M
Conmutación: relé
Longitud del cable del sensor digital de temperatura: 1000 mm
Repetidor Z-Wave: Sí
![]()
¿Por qué Qubino?
Los productos Qubino se diseñan y fabrican en la UE y contienen sólo componentes de la más alta calidad.
Qubino es la marca comercial de GOAP. La empresa GOAP cuenta con más de 30 años de experiencia en proyectos de automatización y un historial de éxito en la implementación de sistemas de automatización en el 50% de los cruceros más grandes y lujosos del planeta.
La innovación es nuestro valor principal y está arraigada en todo lo que hacemos. Nos esforzamos por mejorar constantemente e introducir novedades, adelantándonos a los tiempos. Algunos de nuestros productos son únicos en el mundo. Para dar vida constantemente a nuevas ideas, colaboramos con universidades y centros de investigación.
Qubino garantiza al 100% la calidad de los dispositivos. Se puede ofrecer una calidad tan alta porque cada producto de Qubino pasa por rigurosos estándares de control de calidad durante todo el proceso de producción. Cada dispositivo recibe un número de serie único y un número de pieza, sólo después de pasar por un estricto procedimiento de pruebas.
Para asegurar la calidad de los productos, antes de que entren en el mercado, los probamos y certificamos con instituciones de certificación independientes para recibir el reconocimiento internacional.
Los productos de Qubino cumplen con las directivas de la UE, para garantizar los más altos estándares de seguridad.
Nuestra política de atención al cliente aconseja que cada cliente reciba una respuesta en un plazo de 24 horas.
Sólo tiene que ir a nuestra página web de soporte y abrir un nuevo ticket de soporte. Al indicarnos el número de serie y el número de pieza exclusivos del producto, revisaremos automáticamente el archivo de registro de producción que contiene los parámetros y la información del dispositivo. Esto nos permite identificar y resolver inmediatamente los problemas, ofreciéndole la mejor asistencia al cliente.
Información Ampliada Z-Wave (Inglés)
Descargue el manual desde aquí.
DSK access via UI
Gateways, which implement the S2 and Smart Start security feature, display an input dialog box, with a full or partial DSK key. The majority of them display a partial DSK (they don't show the PIN code), when the device is included with the S2-Authenticated security scheme. When included with the S2-Unauthenticated, some gateways show the complete DSK while others perform the complete inclusion process without prompting the user with the dialogue.
1. Scan QR code on device label and add S2 DSK to Provisioning List in gateway (hub)
2. Connect the device to the power supply (with the temperature sensor already connected).
3. Inclusion will be initiated automatically within few seconds of connection to the power supply and the device will automatically enrol in your network (when the device is excluded and connected to the power supply it automatically enters the LEARN MODE state).
NOTE: LEARN MODE state allows the device to receive network information from the controller.
ⓘ SmartStart inclusion is a part of S2 security level, so if you want to use SmartStart, you need to include it as S2 Authenticated.
MANUALLY ADDING THE DEVICE TO A Z-WAVE NETWORK (MANUAL INCLUSION)
1. Enable add/remove mode on your Z-Wave gateway (hub)
2. Connect the device to the power supply (with the temperature sensor already connected*)
3. Toggle the switch connected to the I1 terminal 3 times within 3 seconds (The device has to get On/Off signal 3 times, meaning 3 times click on the push button or with the normal button 3 times On/Off.) (this procedure puts the device in LEARN MODE) in the first minute after power cycle.
OR
If the device is powered by 24 V SELV supply, press and hold the S (Service) button between 3 and 6 seconds (this procedure puts the device in LEARN MODE)
4. A new device will appear on your dashboard
5. Inclusion with the switch connected to I1 terminal is not limited by time
*If connecting the temperature sensor, switch off the power supply.
NOTE1: LEARN MODE state allows the device to receive network information from the controller.
1. Connect the device to the power supply
2. Make sure the device is within direct range of your Z-Wave gateway (hub) or use a hand-held Z-Wave remote to perform exclusion
3. Enable add/remove mode on your Z-Wave gateway (hub)
4. Toggle the switch connected to the I1 terminal 3 times within 3 seconds in the first minute after power cycle (The device has to get On/Off signal 3 times, meaning 3 times click on the push button or with the normal button 3 times On/Off).
OR
If the device is powered by 24 V SELV supply, press and hold the S (Service) button between 3 and 6 seconds
5. Exclusion with the switch connected to I1 terminal is not limited by time
6. The device will be removed from your network, but any custom configuration parameters will not be erased
NOTE1: LEARN MODE state allows the device to receive network information from the controller.
NOTE2: After device is excluded you should wait 30 seconds before performing re-inclusion.
1. Connect the device to the power supply
2. Within the first minute (60 seconds) the device is connected to the power supply, toggle the switch connected to the I1 terminal 5 times within 3 seconds (The device has to get On/Off signal 5 times, meaning 5 times click on the push button or with the normal button 5 times On/Off).
OR
If the device is powered by 24 V SELV supply, press and hold the S (Service) button for more than 6 seconds
ⓘBy resetting the device, all custom parameters previously set on the device will return to their default values, and the owner node ID will be deleted. Use this reset procedure only when the main gateway (hub) is missing or otherwise inoperable. If an end device is factory reset, it is reverted to the Z-Wave SmartStart inclusion state.
Opiniones
Accesorios, complementos y/o alternativas

30 otros productos de la misma categoría:
-

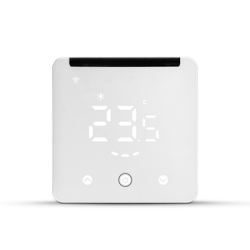
MCO Home -...
-
MCO HOME -...
-

MCO HOME -...
-
Fibaro -...
-
Fibaro -...
-
Fibaro...
-

MCO Home -...
-
MCO Home -...
-
REMOTEC -...
-
MCO HOME -...
-
MCO HOME -...
-
SECURE...
-
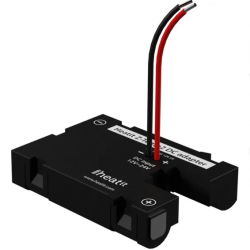
Heatit...
-
Heatit...
-
MCO-Home...
-

HELTUN...
-

HELTUN...
-
MCO Home -...
-
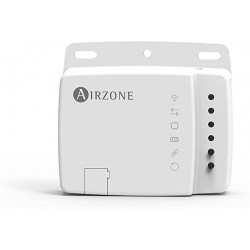
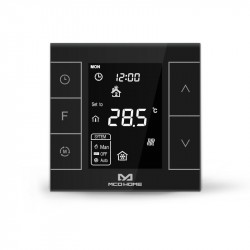
Airzone...
-
Heatit...
-
MCO Home IR...
-
Remotec...
-
Eurotronic...
-
Heatit...
-
ZVIDAR...
-
Heatit ZM...
-
Secure...
-
Heatit...
-

MCO Home...
-

MCO MH5-WH...