Ningún producto
Precios con IVA incluído
Producto añadido correctamente a su carrito de la compra
Hay 0 artículos en su carrito. Hay 1 artículo en su cesta.
Productos más vistos
-

Shelly Qubino Wave Pro...
Regulador inteligente profesional de...
-

Sonoff SNZB-06P -...
El detector de presencia Sonoff...
-

Kit Alarma AJAX HUB2...
Kit de alarma profesional Certificado...
-

Qubino Flush Dimmer 0-10V
Alumbrado inteligente (smarthome...
-

Shelly Qubino Wave Pro...
Interruptor inteligente profesional...


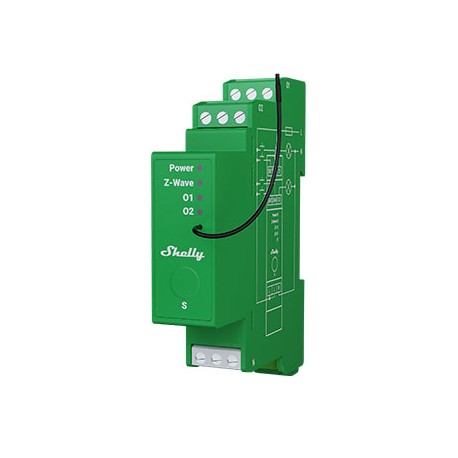

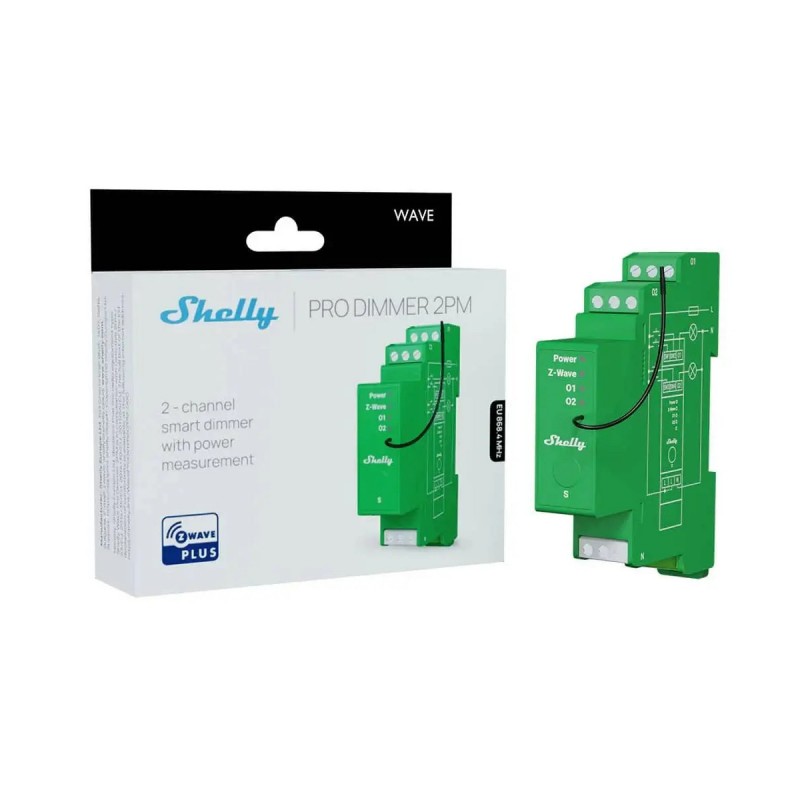

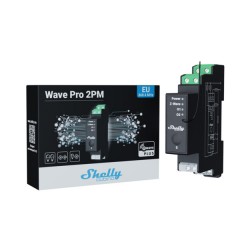
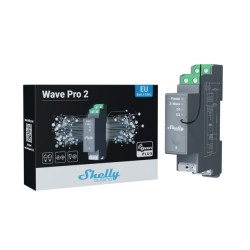
Shelly Qubino Wave Pro Dimmer 2PM
QPDM-0A2P01EU
Nuevo
Regulador inteligente profesional de 2 canales para carril DIN con control de potencia Adecuado para la automatización de viviendas e instalaciones con control remoto. Montaje en carril DIN dentro de una caja de disyuntores. Funciones de seguridad mejoradas.
En Stock - Envío inmediato
- Eliminar de mis favoritos
- Agregar este producto a mis favoritos
- Imprimir

Características técnicas
| Tecnología Domótica | Z-Wave Serie 800 |
| Característica | Dimmer |
Descripción
Características principales
Tipo de regulación: Borde de fuga
Medición de potencia
Calibración automática de la regulación
Modo de entrada interruptor/botón
Utilización con los interruptores existentes (control de uno o dos botones)
Brillo mínimo/máximo ajustable
Velocidad y tiempo de transición ajustables
Montaje en carril DIN
Consumo de energía extremadamente bajo: < 0.3 W
Banda de frecuencia Z-Wave: 868,4 MHz (países CEPT)
Última tecnología: Serie Z-Wave 800
Configuración automática con SmartStart
Seguridad 2 autenticada para el máximo nivel de seguridad
Actualizaciones de firmware por aire
Funciona con pasarelas certificadas Z-Wave y más de 4.000 dispositivos Z-Wave
Specifications
|
Power supply |
110 - 240 V AC, 50/60 Hz |
|
Power consumption |
< 0.3 W |
|
External protection |
10 A, tripping characteristic B or C, |
|
Dimming type |
Trailing edge |
|
Power measurement [W] |
Yes |
|
Max. output power |
200 W per channel |
|
Overheating protection |
Yes |
|
Overload protection |
Yes |
|
Overvoltage protection |
Yes |
|
Distance |
Up to 40 m indoors (131 ft.) (depends on local condition) |
|
Z-Wave® repeater: |
Yes |
|
CPU |
Z-Wave® S800 |
|
Z-Wave® frequency bands |
868.4 MHz |
|
Maximum radio frequency power transmitted in frequency band(s) |
< 25 mW |
|
Size (H x W x D) |
94x19x69 ± 0.5 mm / 3.70x0.75x2.71 ± 0.02 in |
|
Weight |
75 g / 2.7 oz |
|
Mounting |
DIN rail |
|
Screw terminals max. torque |
0.4 Nm / 3.54 lbin |
|
Conductor cross section |
0.5 to 2.5 mm² / 20 to 14 AWG (green connector) |
|
Conductor stripped length |
6 to 7 mm / 0.24 to 0.28 in (green connector) |
|
Shell material |
Plastic |
|
Color |
Lime |
|
Ambient temperature |
-20°C to 40°C / -5°F to 105°F |
|
Humidity |
30% to 70% RH |
|
Max. altitude |
2000 m / 6562 ft. |
Información Ampliada Z-Wave (Inglés)
Note! All Device outputs (O, O1, O2, etc. - depending on the Device type) will turn the load 1s on/1s off /1s on/1s off if the Device is successfully added to/removed from a Z-Wave® network.
Note! In case of Security 2 (S2) adding (inclusion), a dialog will appear asking you to enter the corresponding PIN Code (5 underlined digits) that are written on the Z-Wave® DSK label on the side of the Device and on the Z-Wave® DSK label inserted in the packaging.
IMPORTANT: The PIN Code must not be lost.
SmartStart adding (inclusion)
SmartStart enabled products can be added into a Z-Wave® network by scanning the Z-Wave® QR Code present on the Device with a gateway providing SmartStart inclusion. No further action is required, and the SmartStart device will be added automatically within 10 minutes of being switched on in the network vicinity.
1. With the gateway application scan the QR code on the Device label and add the Security 2 (S2) Device Specific Key (DSK) to the provisioning list in the gateway.
2. Connect the Device to a power supply.
3. Check if the blue LED is blinking in Mode 1. If so, the Device is not added to a Z-Wave® network.
4. Adding will be initiated automatically within a few seconds after connecting the Device to a power supply, and the Device will be added to a Z-Wave® network automatically.
5. The blue LED will be blinking in Mode 2 during the adding process.
6. The green LED will be blinking in Mode 1 if the Device is successfully added to a Z-Wave® network.
Adding (inclusion) with the S button
1. Connect the Device to a power supply.
2. Check if the blue LED is blinking in Mode 1. If so, the Device is not added to a Z-Wave® network.
3. Enable add/remove mode on the gateway.
4. To enter the Setting mode, quickly press and hold the S button on the Device until the LED turns solid blue.
5. Quickly release and then press and hold (> 2s) the S button on the Device until the blue LED starts blinking in Mode 3. Releasing the S button will start the Learn mode.
6. The blue LED will be blinking in Mode 2 during the adding process.
7. The green LED will be blinking in Mode 1 if the Device is successfully added to a Z-Wave® network.
Note! In Setting mode, the Device has a timeout of 10s before entering again into Normal mode.
Adding (inclusion) with a switch/push-button
1. Connect the Device to a power supply.
2. Check if the blue LED is blinking in Mode 1. If so, the Device is not added to a Z-Wave® network.
3. Enable add/remove mode on the gateway.
4. Toggle the switch/push-button connected to any of the SW terminals (SW, SW1, SW2, etc.) 3 times within 3 seconds (this procedure puts the Device in Learn mode*). The Device must receive on/off signal 3 times, which means pressing the momentary switch 3 times, or toggling the switch on and off 3 times.
5. The blue LED will be blinking in Mode 2 during the adding process.
6. The green LED will be blinking in Mode 1 if the Device is successfully added to a Z-Wave® network.
*Learn mode - a state that allows the Device to receive network information from the gateway.
Note! The Device will be removed from your Z-Wave® network, but any custom configuration parameters will not be erased.
Note! All Device outputs (O, O1, O2, etc. - depending on the Device type) will turn the load 1s on/1s off /1s on/1s off if the Device is successfully added to/removed from a Z-Wave® network.
Removing (exclusion) with the S button
1. Connect the Device to a power supply.
2. Check if the green LED is blinking in Mode 1. If so, the Device is added to a Z-Wave® network.
3. Enable add/remove mode on the gateway.
4. To enter the Setting mode, quickly press and hold the S button on the Device until the LED turns solid blue.
5. Quickly release and then press and hold (> 2s) the S button on the Device until the blue LED starts blinking in Mode 3. Releasing the S button will start the Learn mode.
6. The blue LED will be blinking in Mode 2 during the removing process.
7. The blue LED will be blinking in Mode 1 if the Device is successfully removed from a Z-Wave® network.
Note! In Setting mode, the Device has a timeout of 10s before entering again into Normal mode.
Removing (exclusion) with a switch/push-button
1. Connect the Device to a power supply.
2. Check if the green LED is blinking in Mode 1. If so, the Device is added to a Z-Wave® network.
3. Enable add/remove mode on the gateway.
4. Toggle the switch/push-button connected to any of the SW terminals (SW, SW1, SW2,…) 3 times within 3 seconds (this procedure puts the Device in Learn mode). The Device must receive on/off signal 3 times, which means pressing the momentary switch 3 times, or toggling the switch on and off 3 times.
5. The blue LED will be blinking in Mode 2 during the removing process.
6. The blue LED will be blinking in Mode 1 if the Device is successfully removed from a Z-Wave® network.
Factory reset general
After Factory reset, all custom parameters and stored values (kWh, associations, routings, etc.) will return to their default state. HOME ID and NODE ID assigned to the Device will be deleted. Use this reset procedure only when the gateway is missing or otherwise inoperable.
Factory reset with the S button
Note! Factory reset with the S button is possible anytime.
1. To enter the Setting mode, quickly press and hold the S button on the Device until the LED turns solid blue.
2. Press the S button multiple times until the LED turns solid red.
3. Press and hold (> 2s) S button on the Device until the red LED starts blinking in Mode 3. Releasing the S button will start the factory reset.
4. During factory reset, the LED will turn solid green for about 1s, then the blue and red LED will start blinking in Mode 3 for approx. 2s.
5. The blue LED will be blinking in Mode 1 if the Factory reset is successful.
Factory reset with a switch/push-button
Note! Factory reset with a switch/push-button is only possible within the first minute after the Device is connected to a power supply.
1. Connect the Device to a power supply.
2. Toggle the switch/push-button connected to any of the SW terminals (SW, SW1, SW2,…) 5 times within 3 seconds. The Device must receive on/off signal 5 times, which means pressing the push-button 5 times, or toggling the switch on and off 5 times.
3. During factory reset, the LED will turn solid green for about 1s, then the blue and red LED will start blinking in Mode 3 for approx. 2s.
4. The blue LED will be blinking in Mode 1 if the Factory reset is successful.