No products
Prices are tax included
Product successfully added to your shopping cart
There are 0 items in your cart. There is 1 item in your cart.


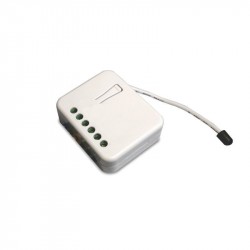
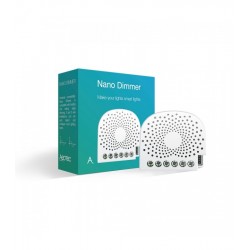
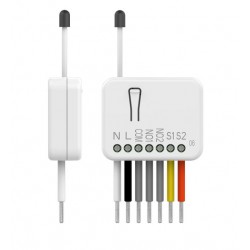
ZOOZ Universal Relay - Z-Wave Plus2 Series 700 Universal Multiple Relay
ZEN17
New
Z-Wave 700 universal relay for multiple uses. Automates everything: for DC motors, some types of shutters, solenoid valves, pumps, gates, garage doors, etc.
Connect wired door open/close sensors or a low voltage signal to trigger alarms
Quick installation: it is powered by a USB Type C charger or with a 12 or 24V power supply.
Out of stock
- Remove this product from my favorite's list.
- Add this product to my list of favorites.

Technical characteristics
| Technology | Z-Wave 700 Series |
More info
2 double outlets
Convert almost any load between 0 and 240 V into a Z-Wave device. Automate garage doors, motors, pumps and more.
You have a normally open or normally closed relay to choose from on each output. In some cases, such as for reverse polarity motors, you may need to use the NC and NO relay terminals. Connect loads up to 20 A (1/2 hp) for NO applications and up to 10 A (1/4 hp) for NC applications. Check your manual for wiring instructions or ask us for guidance on custom wiring for your installation, we'll be happy to help!
These are dry contact relays, which means that each load can work with its own power supply, independently of the other relay and the ZEN17 device itself, which can be powered by 12-24 V or by a USB C plug (the power supply power is not included).
2 double tickets
Monitor analog sensors and other low voltage or dry contact devices using the smart inputs on your universal relay.
Trigger connected outlets with wall switches or buttons for easy physical control. You can also use a low voltage HVAC or alarm signal to close the circuit on the ZEN17 relays. Remember to connect only one type of input (12-24V or dry) at a time for each output.
You can also disconnect the inputs from the outputs and use them strictly for monitoring purposes. Program each one to display as an open/close, motion, water or on/off notification device on your hub to turn your universal relay into a smart monitor with 2 independently controllable outputs.
What can I use it for?
The Universal Relay lives up to its name. There are many creative ways to implement it in your smart home environment.
The most common use case is full garage door automation. Connect a wired door sensor to the entry side and program it to report opening/closing to your facility. Then connect the remote to the output and separate it from the input trigger so you can use the relay to remotely activate the garage door opener. Automate up to 2 garage doors with a single ZEN17 device.
This model is also ideal for controlling reverse polarity motors such as mosquito nets, blinds or motorized awnings. It is perfect for optimizing the use of energy in your HVAC system by automatically controlling dampers or fans throughout the house.
Do you already have the universal relay in your home automation system? Tell us! Use the hashtag #ZoozHome on social media or contact us directly.
ZEN17 Universal Relay Specifications
These are the technical details of the Universal Relay:
Z-Wave signal frequency: 868.42MHz
Power: 12 - 24V / USB C
Maximum load: NO relays: 20 A, NC relays: 10 A
Range: Up to 350 feet line of sight
Installation and use: Indoors only
Operating temperature: 32-104° F (0-40° C)
Dimensions: 4" x 2.5" x 1.5"
ZEN17 universal relay advanced settings
Here is a complete list of advanced settings (parameters) for the universal relay ZEN17 VER. 1.10:
Power on/off status after power failure
Parameter 1: Set the on/off status of the relays after a power failure.
Values:
0 - ALL relays are forced to be OFF (regardless of state prior to power outage);
1 - ALL relays remember and restore on/off status after power failure (default);
2 - ALL relays forced ON (regardless of state prior to power outage);
3 - Relay 1 remembers and restores on/off status after power failure, relay 2 is forced ON;
4 - Relay 2 remembers and resets on/off status after power failure, relay 1 forced ON.
Size: 1 byte dec
Input type for relay 1 (S1)
Parameter 2: Choose the wall switch or input type you want to connect to the S1 C terminals.
Values:
0 - momentary for lights only;
1 - toggle switch (light on when switch is moved up, light off when switch is moved down);
2 - toggle switch (the state changes each time the switch is actuated);
3 - garage door momentary mode (for Z-Wave control);
4 - leak alarm (water sensor);
5 - heat alarm;
6 - movement alert;
7 - open/close alert (door sensor);
8 - CO alarm;
9 - CO2 alarm;
10 - report on/off (dry contact switch/sensor);
11 - Garage door mode for the relay (momentary contact) and door sensor type for the input (use with hardwired analog door/window sensors and garage door openers).
Default: 2.
NOTE: Press and hold the Z-Wave button for 5 seconds to switch to garage mode manually.
IMPORTANT: If you set this parameter to the value 4-11, you will have to exclude and re-include the device (without changing any settings) for a child device to be created for the input of your choice.
Size: 1 byte dec
Parameter 19: Invert the reported values for your selected input type at terminals S1 C (select the same value you chose for parameter 2 to invert the open and closed circuit values).
Values:
0 - values reported as normally open, not inverted (default);
4 - leak alarm (water sensor);
5 - heat alarm;
6 - movement alert;
7 - open/close alert (door sensor);
8 - CO alarm;
9 - CO2 alarm;
10 - report on/off (dry contact switch/sensor);
NOTE: This will not affect the behavior of the relay if you leave the input tied to the output, it will still activate the relay when the circuit is closed (if it is connected between NO-C), regardless of the reported value. This setting only affects the reports displayed on the hub for the input and does not affect the behavior of the relay (output).
Size: 1 byte dec
Input type for relay 2 (S2)
Parameter 3: Choose the wall switch or input type you want to connect to the S2 C terminals.
Values:
0 - momentary for lights only;
1 - toggle switch (light on when switch is moved up, light off when switch is moved down);
2 - toggle switch (the state changes each time the switch is actuated);
3 - garage door momentary mode (for Z-Wave control);
4 - leak alarm (water sensor);
5 - heat alarm;
6 - movement alert;
7 - open/close alert (door sensor);
8 - CO alarm;
9 - CO2 alarm;
10 - report on/off (dry contact switch/sensor);
11 - Garage door mode for the relay (momentary contact) and door sensor type for the input (use with hardwired analog door/window sensors and garage door openers).
Default: 2.
NOTE: Press and hold the Z-Wave button for 5 seconds to switch to garage mode manually.
IMPORTANT: If you set this parameter to the value 4-11, you will have to exclude and re-include the device (without changing any settings) for a child device to be created for the input of your choice.
NOTE: Click and hold the Z-Wave button (so click and hold a second time) for 5 seconds to change this mode (each time you repeat the button sequence down it will take you to the next mode on the screen). setting).
Size: 1 byte dec
Parameter 20: Invert the reported values for the selected input type on terminals S2 C (select the same value you chose for parameter 3 to invert the open and closed circuit values).
Values:
0 - values reported as normally open, not inverted (default);
4 - leak alarm (water sensor);
5 - heat alarm;
6 - movement alert;
7 - open/close alert (door sensor);
8 - CO alarm;
9 - CO2 alarm;
10 - report on/off (dry contact switch/sensor);
NOTE: This will not affect the behavior of the relay if you leave the input tied to the output, it will still activate the relay when the circuit is closed (if it is connected between NO-C), regardless of the reported value. This setting only affects the reports displayed on the hub for the input and does not affect the behavior of the relay (output).
Size: 1 byte dec
LED Indicator Control
Parameter 5: Choose if you want the LED indicator to turn on when the relays are closed (on) or open (off), or if you want it to stay on or off at all times.
Values:
0 - LED indicator turns on when ALL relays are off, LED indicator turns off when any relay is on (default);
1 - LED indicator is on when any relay is on, LED indicator is off when ALL relays are off;
2 - The LED indicator is always off;
3 - The LED indicator is always on.
Press the Z-Wave button 5 times quickly to change the mode manually.
Size: 1 byte dec
Auto-off timer for relay 1
Parameter 6: Use this parameter to set the time after which you want the device connected to Relay 1 to automatically turn off once it has been turned on. The number entered as value corresponds to the number of minutes, seconds or hours (set the unit in Par. 15).
Values: 0 - timer disabled (default); 1-65535.
Size: 4 bytes dec.
Auto-off timer unit for relay 1
Parameter 15: Choose between seconds, minutes and hours as the unit for the relay 1 auto-off timer.
Values: 0 - minutes (default); 1 - seconds; 2 hours.
Size: 1 byte dec.
Auto-off timer for relay 1
Parameter 7: Use this parameter to set the time you want the device connected to Relay 1 to turn on automatically after it has turned off. The number entered as value corresponds to the number of minutes, seconds or hours (set the unit in Par. 16).
Values: 0 - timer disabled (default); 1-65535.
Size: 4 bytes dec.
Relay 1 auto-on timer unit
Parameter 16: Choose between seconds, minutes and hours as the unit for the relay 1 auto-on timer.
Values: 0 - minutes (default); 1 - seconds; 2 hours.
Size: 1 byte dec.
Auto-off timer for relay 2
Parameter 8: Use this parameter to set the time after which you want the device connected to Relay 2 to automatically turn off or once it has been turned on. The number entered as a value corresponds to the number of minutes, seconds or hours (set the unit in Par. 17).
Values: 0 - timer disabled (default); 1-65535.
Size: 4 bytes dec.
Auto-off timer unit for relay 2
Parameter 17: Choose between seconds, minutes and hours as the unit for the relay 2 auto-off timer.
Values: 0 - minutes (default); 1 - seconds; 2 hours.
Size: 1 byte dec.
Auto-off timer for relay 2
Parameter 9: Use this parameter to set the time after which you want the device connected to Relay 2 to turn on automatically after it has turned off. The number entered as value corresponds to the number of minutes, seconds or hours (set the unit in Par. 18).
Values: 0 - timer disabled (default); 1-65535.
Size: 4 bytes dec.
Relay 2 auto-on timer unit
Parameter 18: Choose between seconds, minutes and hours as the unit for the relay 2 auto-on timer.
Values: 0 - minutes (default); 1 - seconds; 2 hours.
Size: 1 byte dec.
Input trigger for relay 1
Parameter 10: Choose if you want the connected input (switch) on S1 C / VC C to trigger the load connected to R1 or if you want to use input reporting for monitoring only and separate output from input.
Values: 0 - input trigger disabled; 1 - input trigger enabled (default).
Size: 1 byte dec.
Input trigger for relay 2
Parameter 11: Choose if you want the connected input (switch) on S2 C / VC C to trigger the load connected to R2 or if you want to use input reporting for monitoring only and separate output from input.
Values: 0 - input trigger disabled; 1 - input trigger enabled (default).
Size: 1 byte dec.
DC motor mode
Parameter 24: Synchronize R1 and R2 together to prevent them from being activated at the same time.
Values:
0 - DC motor mode disabled (the relays will activate whenever they are triggered);
1 - DC motor mode enabled (the relay will check the state of the other relay after being triggered and turn off the other relay or before activating so that only one of the relays is on at the same time).
Default: 0.
Size: 1 byte dec.
MANUAL CONTROL FROM Z-WAVE BUTTON
3 x touch: enter inclusion mode (pairing)
5 x touch: change the mode of the LED indicator (see parameter 5)
Extended Z-Wave info
Manual download HERE.
1. Initiate inclusion (pairing) in the app (or web interface).
2. TAP THE Z-WAVE BUTTON 3 TIMES QUICKLY if using traditional Z-Wave inclusion.
3. The LED indicator will blink to signal communication and remain on for 2 seconds to confirm inclusion.
2. Put the Z-Wave hub into exclusion mode
3. Click the Z-Wave button 3 times quickly
4. Your hub will confirm exclusion and the Universal Relay will disappear from your controller's device list
then quickly click the Z-Wave button 4 times again. The LED indicator will flash 3 times to confirm successful reset and will then turn off.
device (without changing any settings) so that a child device is created for the input of your
choice!
Reviews
30 other products in the same category:
-
Bypass for...
-
Qubino...
-
Qubino...
-
Philio...
-
AEOTEC -...
-
AEOTEC -...
-
Aeotec...
-
Aeotec Nano...
-

Aeotec Nano...
-
Qubino Mini...
-

WiDom Smart...
-
WiDom Smart...
-
WiDom Smart...
-
Qubino...
-
Fibaro...
-
Micromodule...
-
FIBARO RGBW...
-

FIBARO...
-
HELTUN -...
-
HELTUN -...
-
Heatit ZM...
-
Philio...
-
Philio...
-
Philio...
-
Z-Wave to...
-
Heatit ZM...
-
Heatit ZM...
-
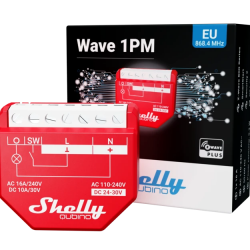
Shelly...
-
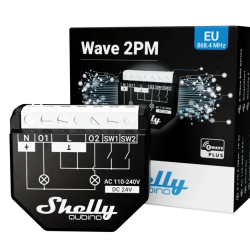
Shelly...
-
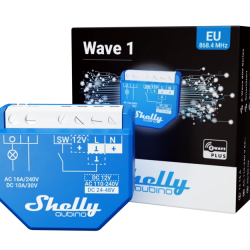
Shelly...